


A duck pond is a great addition to any backyard. Only thinking about having ducks pond house in your backyard is enough to give you a pleasant feel. Also, to help you realize how pleasant your garden can be.
Any person who has a duck pond will agree that having a pond can also be therapeutic.
Besides being a visually appealing landscape add-on, this can also be very practical for raising these animals.
Nothing is worse than watching your ducks suffer in the summer heat. A duck pond is a natural way to keep your feathered pets from feeling the effects of heat stress. In the lines below, we will give you some important information on building a simple duck pond in your yard.
Ducks enjoy swimming in any reasonable water container, no matter if that is a large bowl or a swimming pool. So, if you are going to build a small duck pond, any construction method is suitable. Flexible pond liners, reasonably quick to install, may be used for a pond of virtually any shape and size. Moreover, they are the most inexpensive option for a small duck pond. Before you start, investigate various materials, and don’t forget to set your budget in advance.
How Does Duck Breed Affect the Size of a Pond?
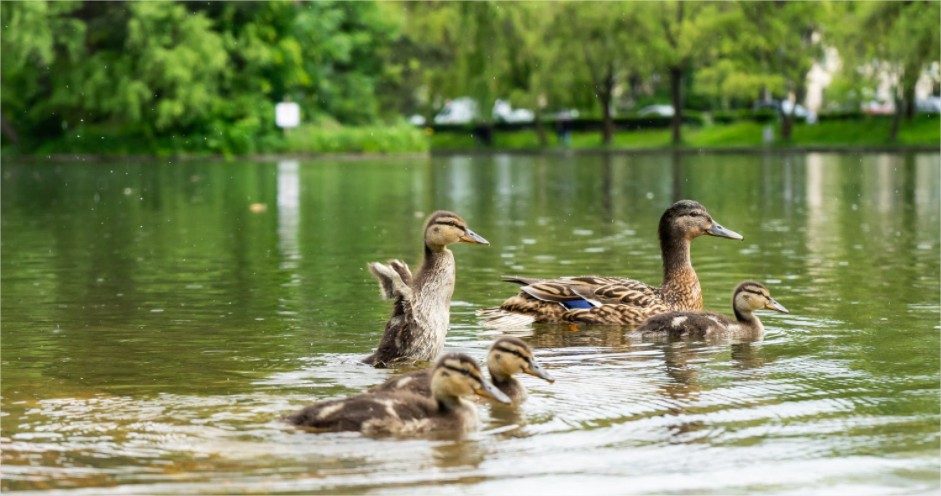
When you don’t have the luxury of a huge water area in your yard, picking the right breed is important. Unlike wild ducks, domestic ducks only spend only about 10% of their day in the water. There are many different breeds of domestic ducks, and humans have raised them on farms or backyards as .
Some of the most popular domestic breeds are
- Pekin
- Swedish
- Buff
- Indian Runner
- Welsh Harlequin
- White Crested
- Cayuga, Rouen
- Muscovy
- Khaki Campbell & Call Ducks.
Domestic ducks are very poor flyers, so you don’t have to worry whether they will fly away.
They nest in the bushes and spend their day searching for slugs in the garden or the woods.
Domesticated ducks love a little pond just for splashing, keep in mind that you do not need a king-size water area for them. Also, cleaning it can be an unnecessary hassle when having a large pond. The only requirement ducks have the water should be deep enough for them.
To submerge their whole head to keep their mucous membranes moist. Having clean water available at all times is important for duck life. It is better to build a pond of a size that would be easy to maintain.
In case you are not sure about the size of the duck pond you need, you can buy a small kiddie pool about 3 feet across and about 5 inches deep and holds maybe 20 gallons of water. It’s good for little ducklings or a pair of ducks and it is easy to tip over, empty, and clean.
But the downside is it needs to be emptying and cleaning every day in the summer, or once in two days in the spring or fall. As your ducks grew, you will realize they wanted to swim and dive underwater, so you can expand your pond.
The Process of Building a Duck Pond
If you’re thinking about building a pond, it’s as simple as starting to dig. You should pick out the spot, roughed in shape, and get started. However, there are certain things you can do to ensure to finish this process successfully and hassle-free.
These few steps will help you build a duck pond much easier.
- Finding an area for a pond
- Map out the project
- Sketch the pond, dig
- Install the biofilter system
- Trim and seal the PVC pipe
- Fill and decorate the pond
Below we will provide a detailed explanation for each mentioned phase.
Step 1: Find a Good Area for Your Pond
Find a good spot for your duck pond, and then cover the area surrounding it with wood chips and mulch to prevent the ducks from making a mess once the pond is finished.
Step 2: Plan the Project
First, you need to consider how much time and money you can set aside for your future duck pond and map out the project.
For manual digging and building a 1.000-gallon pond in your yard, it would take three people and around 70 hours of work. Building a duck pond will require strength, so it’s better for you to hire someone to help you.
Step 3: Sketch the Pond Dimensions
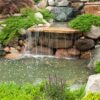
You should figure out the construction sequence of your pond and decide on what filter system to use, bubblers or waterfalls, as well as how deep and large the actual pond will be.
Once you’re done sketching the pond’s dimensions, create the outline using some rope and follow the specifications on your sketch. This is one occasion when absolute accuracy is not essential. Now measure the longest and widest points of the pond. You must add at least twice the proposed depth to these measurements to ensure there will be sufficient liner for construction. You can also choose an attractive hard-plastic pond liner that was already molded into shape. These prefabricated liners make it easy to create a beautiful area without hard work and stress.
Step 4: Start digging
The first step is to remove all grass and other vegetation. Then it would be best if you dug tiers so the ducks can easily get in and out of the water. Make sure to clean the area of all dirt and level the hole.
You can use a rope to ensure the top edge is angled properly and prevent your ducks from getting into trouble that can cause them injuries. You can use clay to level out the surface where the edge is too high.
Step 5: Lay Out the Underlayment and Install the Biofilter System
Once you clean all debris and lay the underlayment out properly inside the hole, make sure that lumps of soil or rocks do not remain beneath the underlayment. After placing the underlayment, you should put up the walls by installing a set of rocks on each level of the pond.
Make sure to leave a small free area for placing the biofilter pond. It won’t function properly if it’s covered. Install it according to the brand’s instructions.
Step 6: Trim and Seal the PVC Pipe
A shorter pipe will drain better because it requires less water pressure. If you want to drain your pond less than 10 feet from your run, you’ll need to cut down a 10-foot length of pipe with a hacksaw.
To create a watertight seal, you’ll need to cement the PVC pipe into the couplings to join them permanently, as well as to prevent leaks and preserve your work.
Smear cement on the PVC pipe, and insert it into the open end of the male coupling as it comes out of the hole in your pond. The cement will take a few minutes to dry.
Once the pipe is solidly attached to the couplings, smear PVC cement on the pipe, add the shut-off valve to the other end of the pipe, and let the cement dry. With that shut-off valve, you can drain the pond whenever you want.
Step 7: Fill the Pond With Water
You’ll need to partially fill the pond to test the seal around the hole as well as all the pipe linkages and couplings. If you do spot some drips, you’ll need to determine where the leak is. Drain the pool, dry off any leaking area, and then spread silicone sealant around the pipe connections and wait until it’s scorched. Test the pond again, and if it doesn’t look like the water is leaking, your pond is complete. If your drainage system is above ground, you can mound dirt on top of the PVC pipe to disguise it, but leave the shut-off valve uncovered so you can easily access it.
Step 8: Decorate your duck pond
After setting up the water filtration system, feel free to fill it with all kinds of plants. Bushy plants are best. Herbs, such as lemongrass, lemon balm, and boxwood basil, are the most attractive options. For fruiting plants, you can choose mulberry and blueberry bushes. Ducks love laying their eggs around these plants.
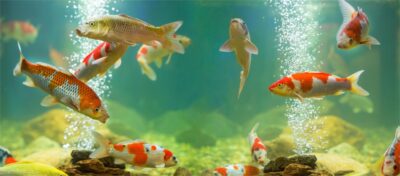
Keep in mind not to incorporate invasive plants in your pond. The worst is purple loosestrife, a marsh perennial whose spike flowers choke out competing plants, or phragmites reed – an aggressive weed that grows in dense thickets up to 10 feet high. If you spot an early infestation, use the herbicide for leaves, but the best defense is to dig out the invasive plants and to remove the roots before they have a chance to seed. Don’t use a blanket herbicide, as it will not just kill the weeds; it will kill everything. You can also add floating plants like pond lilies to your duck pond. If it’s big enough, you can even add fishes.
What to do if ducks aren’t using the pond?
Ducks like water and don’t care what the pond is made of, but sometimes you may encounter some problems when they aren’t using their new pond. Even though you have made a beautiful pond, your ducks may not want to enjoy it. The tips we provided below will help you resolve this problem.
If your ducks aren’t using their new pond, don’t despair. They might need some time to get used to the new environment. You can try tossing some treats into the water like dried river shrimp because they float, and ducks like them.
Also, add rocks around the pool, use only flagstones, and leave some dirt areas intact to grow grass. Stones radiate heat from the sun, and ducks are particularly susceptible to burns, scrapes, and other health problems with their feet, so they should have cool areas to walk.
Benefits of a Clean Pond
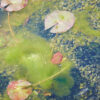
Don’t skip the step of adding a drain to your duck pond because ducks are very messy and will muddy up the water very fast. As they live and eat at the duck pond, they also leave their waste in the water. This waste releases nitrates into the water. The buildup of nitrates over time – along with other factors, such as increased sunlight – leads to the formation of algae, giving the water a green or brownish color.
Dirty and stagnant water attracts mosquitoes and other harmful organisms to your ducks. While our feathered friends love the water, no matter if it’s dirty, you won’t love the smells from an algae-ridden pond. Cleaning the pond consistently is crucial to your ducks’ health and a plus for your garden, as you can reroute the nitrogen-rich muck to your garden.
Building and maintaining a duck pond is not as easy as it seems. However, the benefits it provides for your ducks make all the time, money, and effort you put into the project worth it.
Is There a Way to Wash a Duck Pond?
One way to keep your duck pond clean is to regularly check the pH level of the water with a pH testing kit. The normal pH of a duck pond should be between 6.8 and 7.8, but if it is between 6.0 and 8.5, that is also acceptable. If the pH is too high or too low, then the pond will need to be cleaned.
To wash your pond, allow it to drain, and then use a hose with good pressure to sweep out any dirt. Once it’s clean, shut the valve off, so the system is watertight again. If you have an electric pump that connects to a hose, you can pump the waste out beyond your yard if you have a possibility for that. It doesn’t take long, and it is quite easy to do.
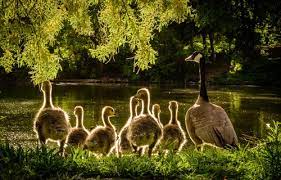
An attractive duck pond will provide a cool environment for your ducks all summer long, and you will enjoy looking at them as well as listening to the soothing sound of water.


Pingback: Jan